This page provides instructions for users on how to upload their files from a mobile phone while using one of Iowa Workforce Development's webforms.
Note: Uploading documents on your mobile phone will appear slightly different than on your desktop, and may also differ depending on your type of device and operating system. Please take note of the instructions below.
If you are uploading documents from a computer, Upload Files From My Mobile Phone for instructions.
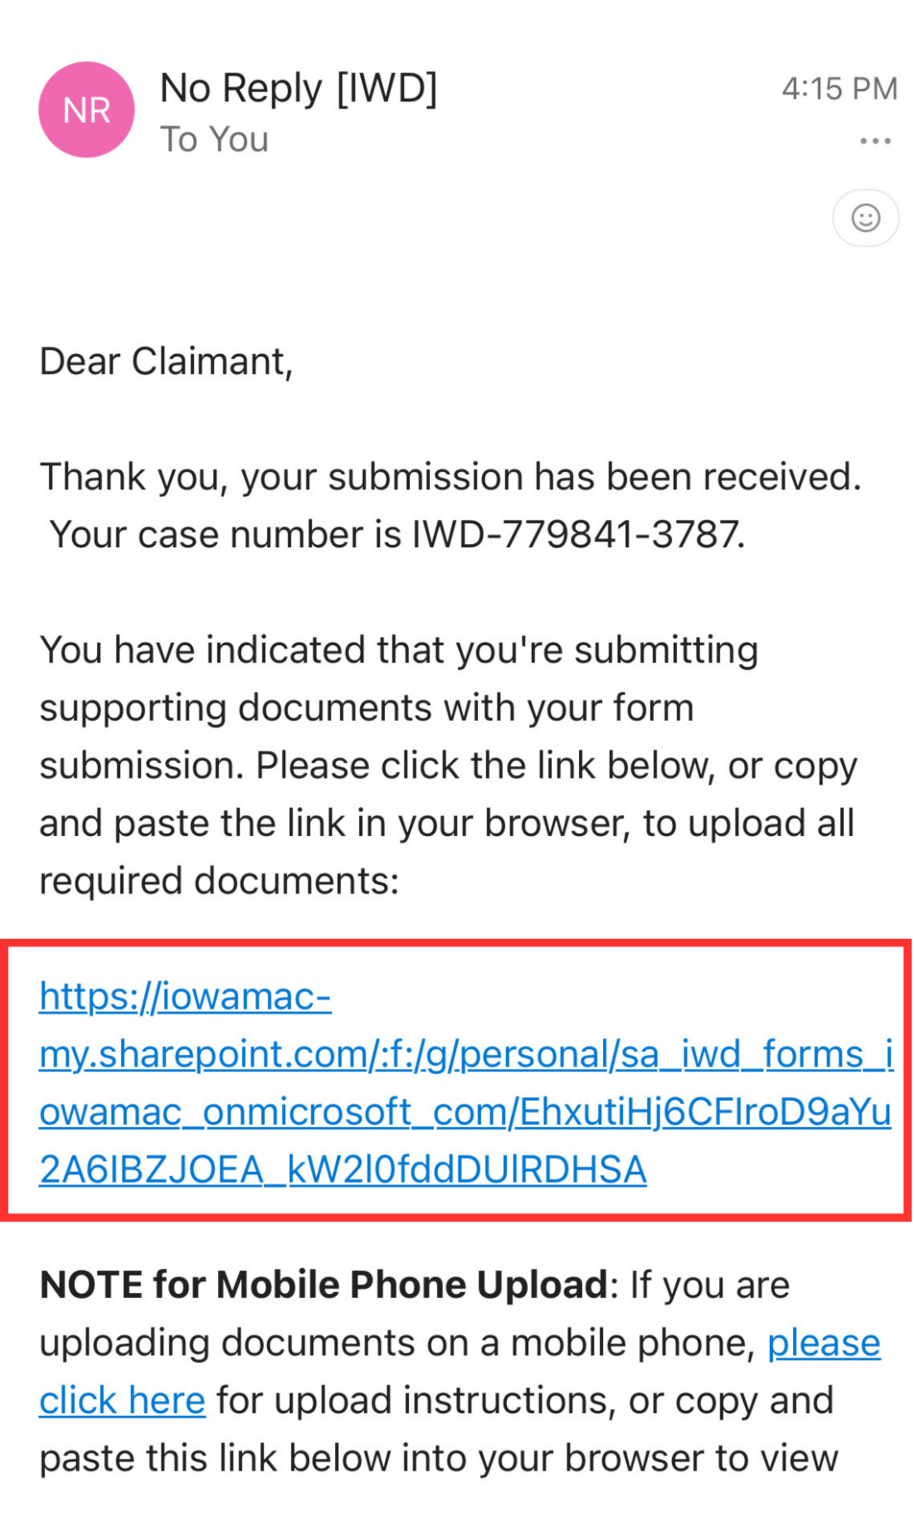
Step One: Click on the File Upload Link in Your Email
As soon as you hit submit on the webform, check your email address immediately for a secure link to upload your documents.
- The email will come from [email protected].
- If you can't locate a "File Upload" email in your inbox, please check your spam folder.
- If you are still unable to locate the file upload link, please email the designated agency area for support.
- For identity verification, contact [email protected]
Please click the link in your email, or copy and paste it into your browser, to upload all required documents. An example email is below.
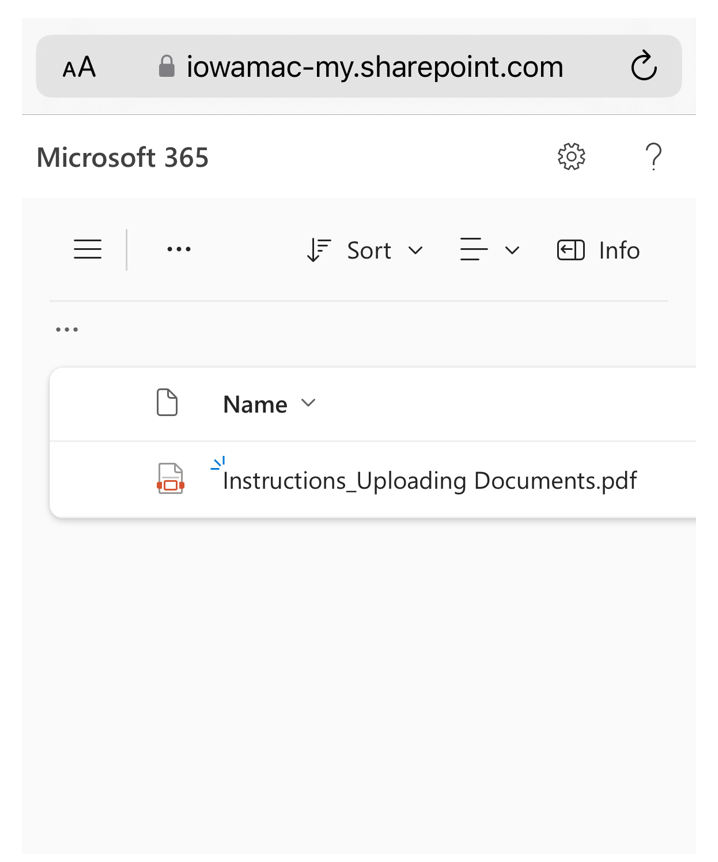
Step Two: Verify the Location to Upload Your Files
After clicking on the secure link in your email, you will be taken to a Microsoft 365 location and will see this page on your phone. This is where your files will be uploaded.
- You will see an instructions document for reference. Once uploaded, your files will also be displayed here.
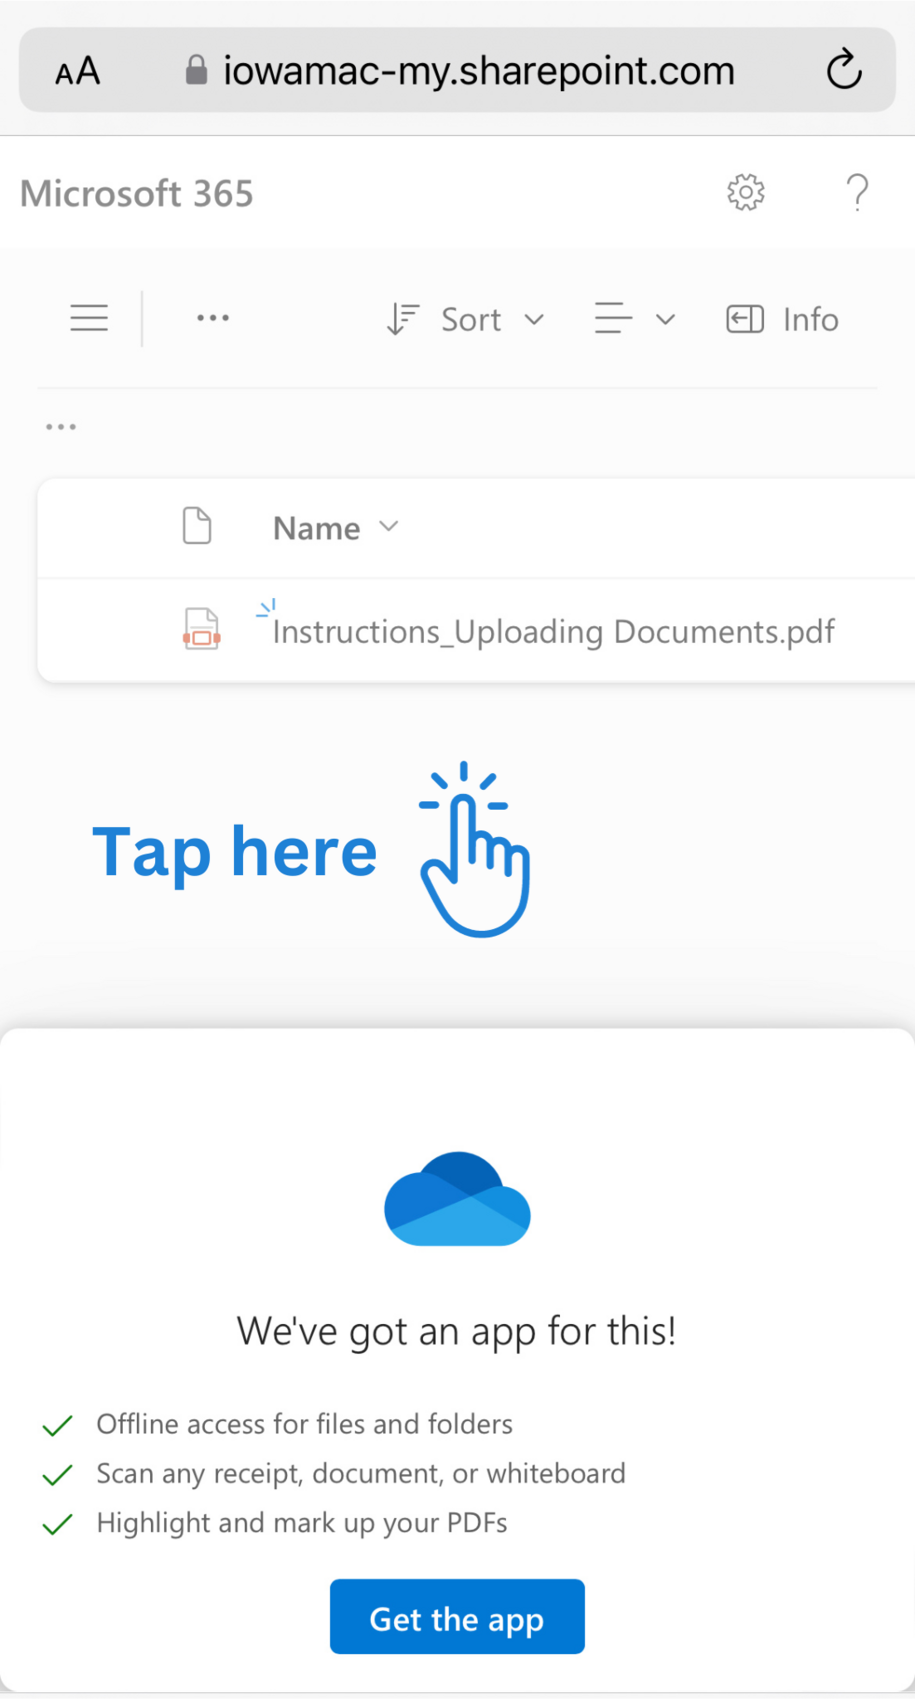
- Note: You may see a pop-up from Microsoft that says “We’ve got an app for this!” at the bottom of the screen. You can disregard this message. To do so, just tap anywhere on the screen above the pop-up.
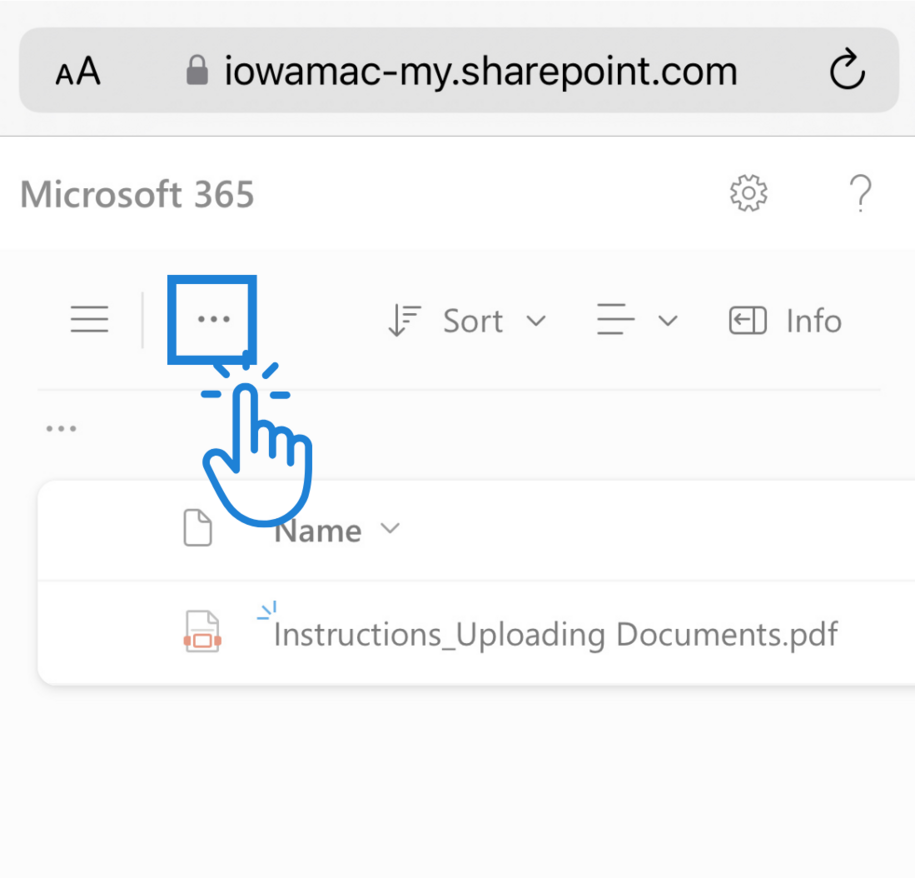
Step Three: Start Uploading Your Files
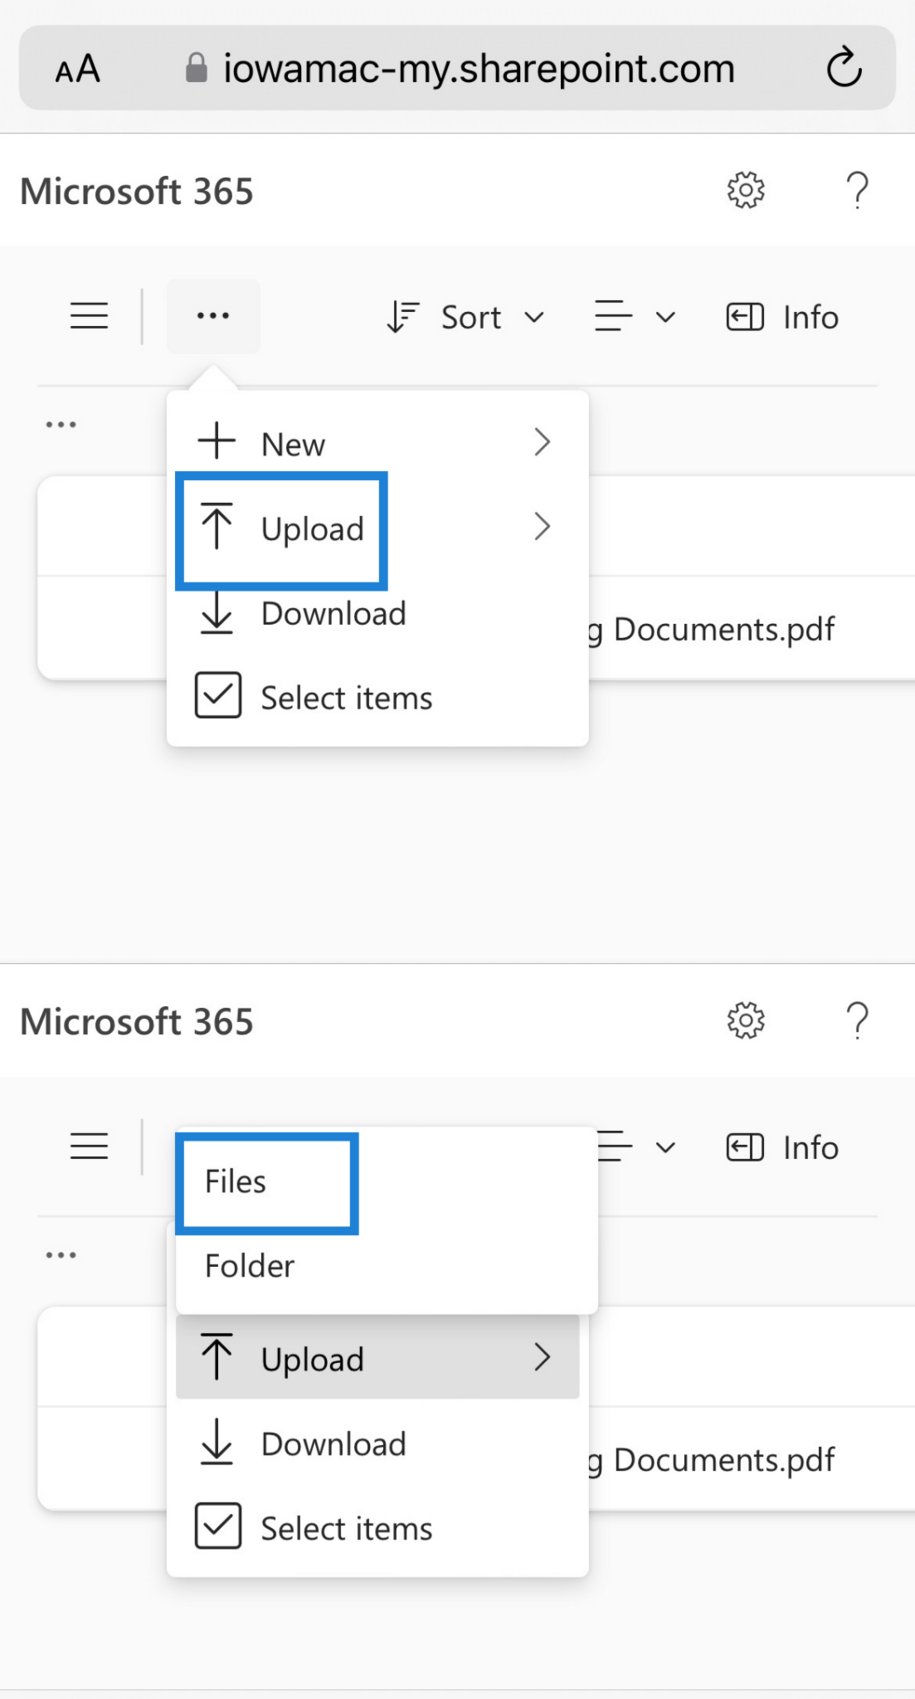
- To being uploading your files, tap on the three dots at the top of the page, located on the menu bar. This will bring you to the file upload option.
- After tapping on the three dots on the menu, tap on Upload.
- After you select Upload, tap on Files. This is when you will begin uploading your files.
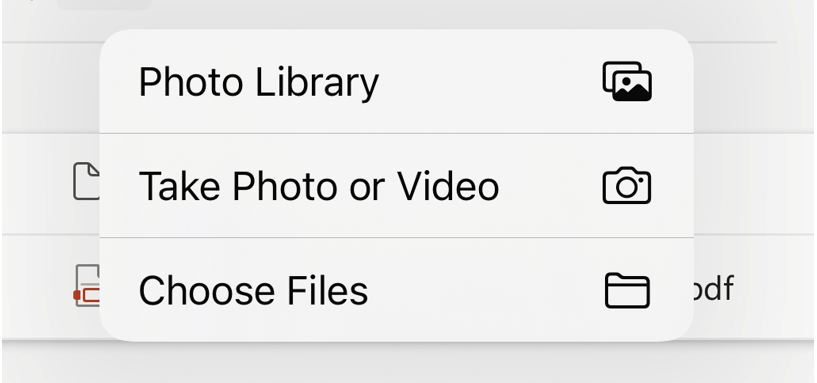
- After selecting Files, a pop-up will appear on your phone screen to locate your files (including photos and documents). Please locate your file(s) on your phone and select them to start automatically uploading files into your folder.
- If you need to upload multiple documents or photos, repeat this step for each file.
Step Four: Verify Your Files Are in the Upload Area
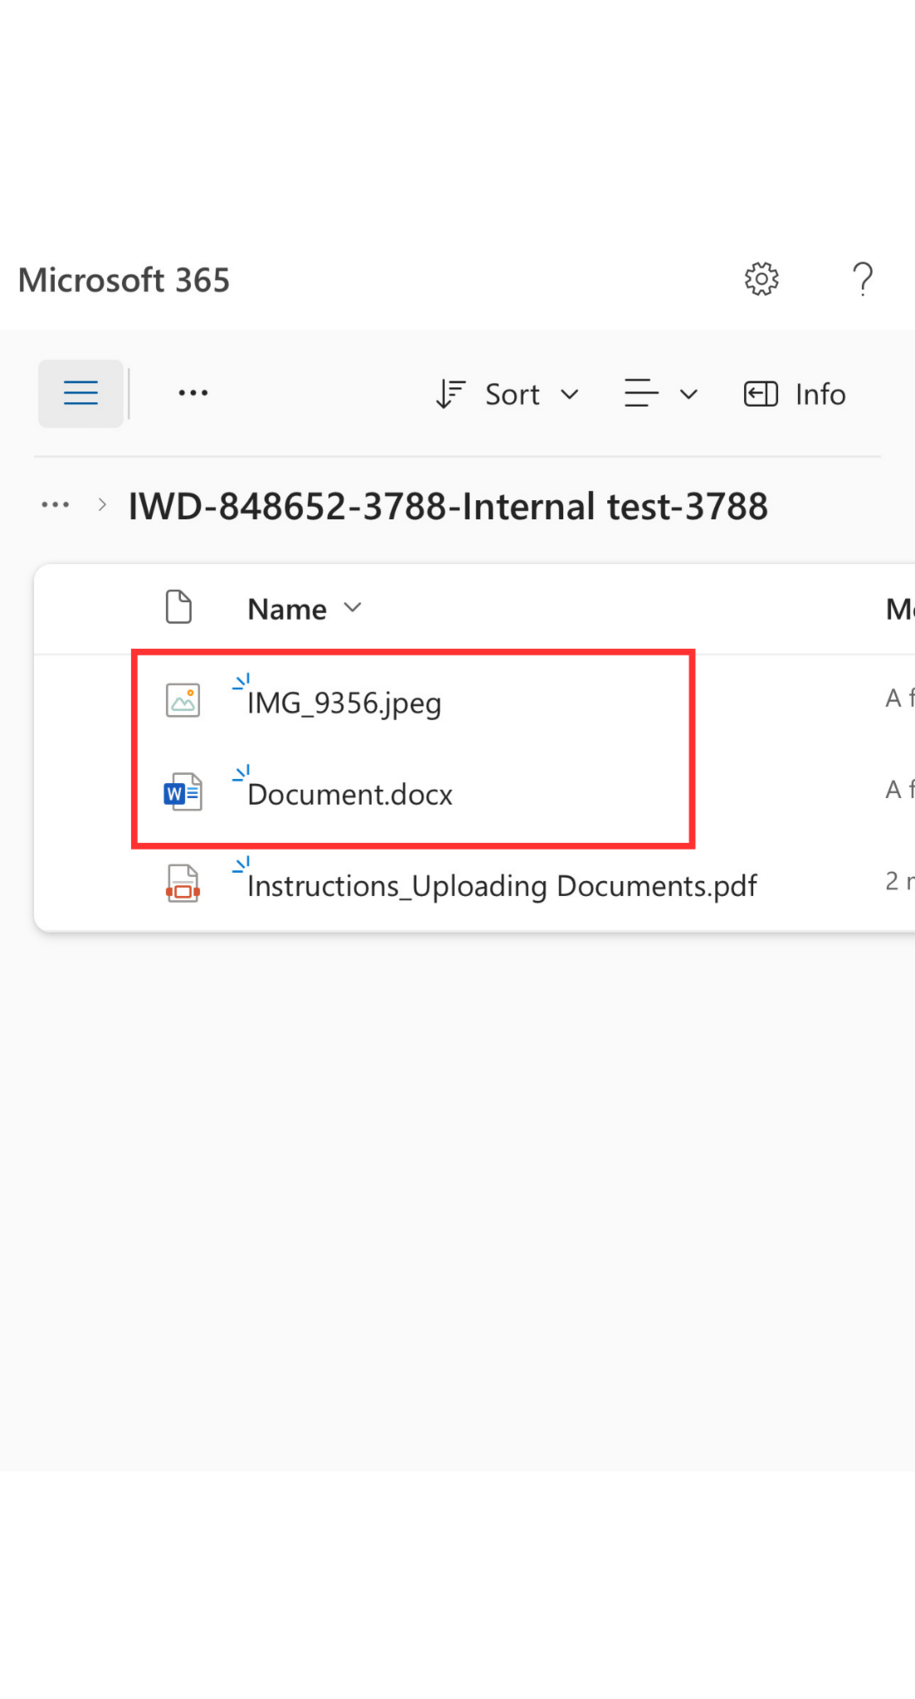
- Once you've uploaded all of your files (photos and documents), please verify that they are seen in your folder.
- The names of your file(s) will appear next to the instructions document, like the example photo below. Once you're confirmed that your files are uploaded into the folder, you're all done.
Step Five: You're All Done (But Here's Information To Get Help If Needed)
After you've verified that your files are uploaded, you're all done! IWD staff will review your documentation, and will contact you should we need more information.
Note: Documents and verifications will be reviewed in the order in which they are received, and it may take 5-7 business days to get documents verified.
If you still need help, contact us: